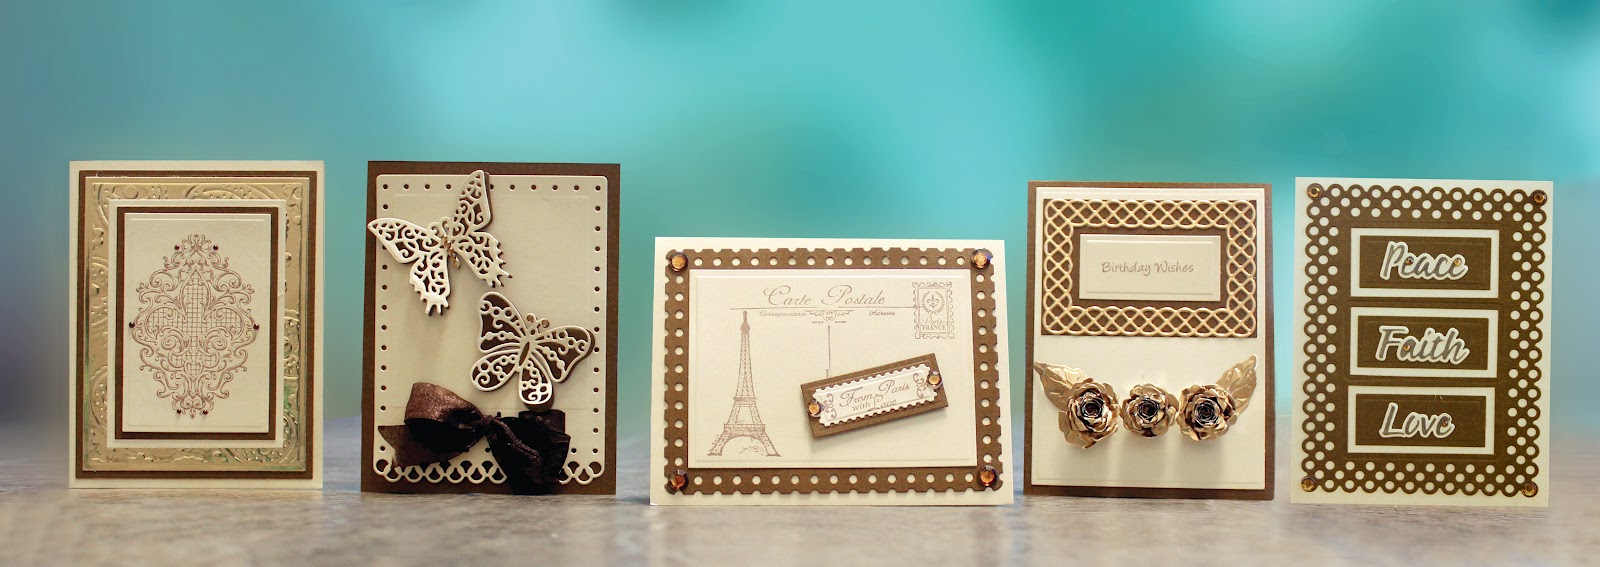
E6000 Spray Glue! I LOVE THIS NEW GLUE for intricate designs such as these you just spray and there is no mess, smell and it bonds beautifully! Available Mid March!
Turn paper and score again at every inch on diagonal.
Use the Flower from the Floral Ribbon Set inside each square. Make sure to tape so you have the flower in the center of each square you choose before die cutting.
Ink edges with Dusty Concord and add buttons to finish card.
*** BONUS DRAWING for a chance to win the Cindy Echtinaw Designs Stamp Set below, Please leave me a comment here on my blog as to which card above is your favorite or which NEW Card Creator Die is a must have for you. I will draw ONE lucky winner
on March 10 to receive my New Cindy Echtinaw Designs Words and Typewriter Stamp Set here
that I used on my Easter Card Above. CONGRATS CATHY R for your comment and winning please contact me with your address to ship your stamps! Thanks everyone for your comments!
Welcome Friends! I am so excited to be taking part
in the Sneak Peek for Spellbinders.
As the licensed designer for these dies, it is my pleasure to introduce
the Newest Card Creator Dies!
Here is my first project I created with the new
Locking Loops Dies.
Be sure to read all the way thru for
instructions and a video for creating this card.
Tim Holtz Distress Inks in Black Soot and Walnut Stain
I started with an A2 Black Card Base. Then cut and embossed all dies
as listed in my Supply List
Layer Locking Loops dies as show onto A2 Card Base
Take M-Bossabilities Imperial folder and open flat. Lay
Spellbinders A2 Matting Basics B S5-132 (Die #3) in the die with cut side up
place a Tan embossing mat & Raspberry spacer plate over top and run thru Grand Calibur it will emboss the design inside but not the edges as shown
Take Distress ink and Ink blending
tool and ink over raised embossed design leaving card stock in die.
Take Distress inks and ink grosgrain white ribbon and attach to center of black ribbon using Scor-Tape. Feed ribbon thru Locking Loops Ribbon die then attach to
embossed piece. Use pop dots to attach to card front.
Stamp Sentiment onto Square Die and add pearls.
I colored my pearls using white pearls and Copic marker 100 .
This close up view shows the dimension to this card and the beauty of
the Locking Loops dies.
HERE IS THE STEP BY STEP VIDEO if you learn easier this way. Warning its a long one - 9 minutes :)
Here is another sneak peak of the NEW Beautiful A2 Rounded Corner Dies set A & B
Below my card is a video showing you how to use these
NEW Rounded Corner Dies to create the weaved
die in the center and how to use two of the D-Lites Medallion Two
dies to create the background for the weaved rounded corner piece.
A step by step instruction video on how to make the card above.
Welcome friends! I am so excited to be taking part in the Sneak Peek: Spellbinders™ Summer Spectacular! Today it is my turn to introduce the new summer dies that will be available soon from Spellbinders... And even more exciting is that I am the licensed designer of this line of dies.
Card Creator comes in 6 Creative sets: Two Basics that will perfectly cut ⅛", ¼" & ½" spaced layers and 4 decorative sets to mix and match with Card Creator Basics for all your Card Creating needs!
I discovered a new way to use Spellbinders dies .....Using the dies with Fimo clay!
Prepare the Fimo Taking Fimo clay, roll out enough clay for the Plain Dress Form die and red rubber stand from the All Dolled &Dressed Up stamp set.
Take the Plain Dress Form die template, impress it into the clay then cut the shape out. Carefully remove the clay cutout from the die template. Place the Paisley print red rubber stamp on an acrylic block; impress this into the clay dress form.
Next, using another rolled out piece of clay, impress the stand trim around the outside edges of stand. Attach stand to bottom of dress form by carefully pressing these together & bake according to manufacturer’s instructions on package.
Prepare the card Start out with an A2 size (4 ¼ x 5 ½") card. Cut /emboss the following out of cardstock, using Spellbinders™ Grand Calibur® machine. Tip: Place wax paper between the cardstock and the die, using wax paper allows the cut die shape to release easier after it is embossed. (A) 1 - Rectangle LG Fancy Postage die (B) 1 - #7 (#1being the smallest) Basic Card Creator Set A die (C) 1 - #4 Basic Card Creator Set B die (Embossed using Patchwork M-Bossabilities) (D) 1 - Fancy Postage Tag die (E) 2 - Bitty Blossoms Large Flower & double leaves dies (D)
Lightly sand and ink all edges of each piece except bitty blossoms.
To make the Bitty Blossom flowers, use 8mm ball stylus to round the petals. Start with the first two embossed side up and then turn over and round the remaining petals. Assemble the Bitty Blossoms by adding a drop of hot glue to the first outside two. Roll the remaining petals, keeping these a little tight, until you reach the circle that is shown below. Release a little pressure allowing the petals to unwind slightly. Add some glue to the circle and place the flower base on top of this to create the Bitty Blossom.
Once the Fimo Dress Form has been baked and is cooled take the Tumbled Glass distress ink, using a dauber apply ink to the dress form. Once the color is as desired, take a paper towel and lightly rub the ink off the top of the dress form. Rubbing lightly will only remove the color off the raised portions of the dress form. Do the same for the stand using Shabby Shutters ink. Assemble the card in the following order using key above · Card Base · Piece A · Piece B · Piece C with Fimo Dress form attached · Piece D · Pieces E
Add some pearls and a little glitter using Smooch Glitter or Stickles to the Bitty Blossoms. I hope you have enjoyed visiting my blog today and sharing my debut, as a Licensed Designer for Spellbinders with me! With the Basic Card Creator and Decorative dies the possibilities are endless. No measurement or guess work is needed; we have done all of that for you. Cut, emboss, stencil, and assemble!
Here is another card using the Basic Card Creator and the Fancy Ribbon Threader decorative dies.
Here is a video to show you more ideas using the Card Creator Line
I’m pleased to introduce you to my good friend and President of Spellbinders, Stacey Caron. She’s created some beautiful cards of her own to share with you using the Nestabilities Card Creator die templates.
I’m so excited to finally share with the world a wonderful collaborative effort between myself and a dear friend of mine Cindy Echtinaw, called NESTABILITIES® CARD CREATOR!!
Cindy has been a Spellbinders supporter, customer and stamping partner for quite a while. She wanted decorative Spellbinders die templates that could coordinate perfectly with Spellbinders Nestabilities and A2 size cards... Hence.... The birth of a fabulous new card making line that will make achieving beautiful cards quick, easy, and fun.
We even came up with a cool way to remember what Spellbinders Nestabilities CARD Creator will mean for card makers everywhere...
C= choose your design A= assemble your pieces R= refine the details D= All Done!
I was so moved by the designs in Cindy's line… how fast and easy it was to create truly beautiful cards with little effort! I really wanted to share all four decorative sets and the two basic sets with you during our blog frenzy... This way you can get the real message of all the possibilities your mind is about to encounter... LOL! Here is the best part... It's just the beginning!!!
As you can see from both Cindy's cards and my cards, we both have very different styles even though we used the same card creator die templates! Lots of possibilities no matter what your style may be.
I so enjoy working with talented artists to bring fabulous, useful products to our supporters! We hope you enjoy Nestabilities Card Creator as much as we did in creating it for you! You can find the instructions to all of my cards HERE.
Xxoo Stacey
The Sneak Peek: Spellbinders™ Summer Spectacular! Begins on June 21st and will end on June 28th, 2012. It consists of 24 individual prizes and one grand prize drawing. Enter the Sneak Peek: Spellbinders™ Summer Spectacular! by visiting the participating blogs each day.
At the end of each blog post, click on the "Enter HERE" to open the entry form. You may only enter once from each blog each day. Day Two of this contest is now closed PLEASE visit www.spellbinderspaperarts.com for more inspiration
Spellbinders™ will randomly draw one winner from each participating blog to receive that blog’s newly revealed dies. The Grand Prize Winner will be randomly drawn from the pool of entrants who sent entry forms from each and every participating blog during the 48 hours each blog was open.